Orangepi做编程器
前些天路由器被刷坏了,手头上又没有支持那路由器的flash的编程器,淘宝上支持的叫价两百多,无意中看了下OPI的gpio图发现可用来当编程器,于是便死马当活马医,想不到能识别那flash并且刷写成功救活了我的路由器。
在此分享下经验,互相交流学习。
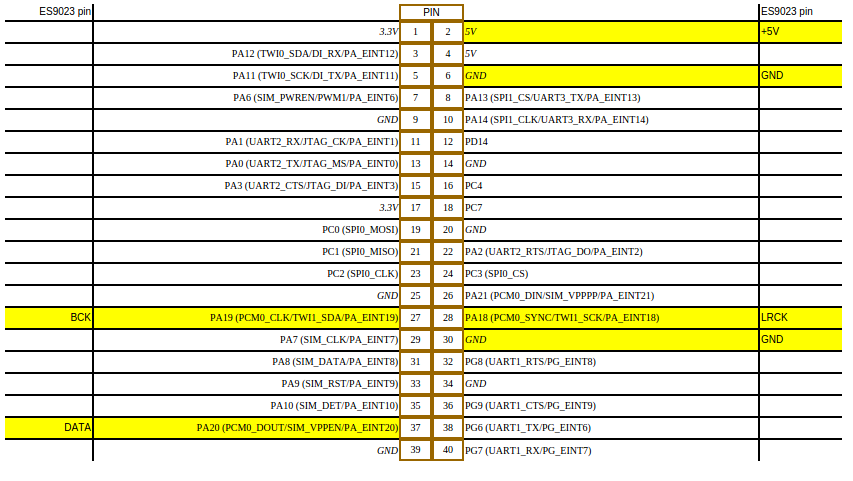
1、端口定义及连接
OrangePi的40PIN外设端口定义

8脚Flash rom的连接定义(具体请自行查询相应flash rom的定义)
8765
-----
|   |
○---
1234
| Pin # | OrangePi | ||
|---|---|---|---|
| 1 | spi0_cs | 24 | |
| 2 | spi0_miso | 21 | |
| 3 | not used | ||
| 4 | gnd | 25 | |
| 5 | spi0_mosi | 19 | |
| 6 | spi0_clk | 23 | |
| 7 | not used | ||
| 8 | vcc3.3v | 17 |
2、刷写
加载spi驱动
sudo modprobe spi-sunxi
sudo modprobe spi-dev
在/dev下你会发现多了个spidev0.0设备
编译flashrom
注:实际上直接用sudo apt-get install flashrom也是可以的
sudo apt-get install build-essential pciutils usbutils libpci-dev libusb-dev libftdi1 libftdi-dev zlib1g-dev subversion
svn co svn://flashrom.org/flashrom/trunk flashrom
cd flashrom
make
编译时有可能提示找不到libusb1.0,可试试sudo apt-get install libusb-1.0*
按针脚定义连接上flash之后尝试看看有没有识别出flash
sudo ./flashrom -p linux_spi:dev=/dev/spidev0.0


然后开始刷写
sudo ./flashrom -p linux_spi:dev=/dev/spidev0.0 -w /home/hd255G.bin
看到如下提示说明烧写成功
Reading old flash chip contents... done.
Erasing and writing flash chip... Erase/write done.
Verifying flash... VERIFIED.
以后电脑bios刷坏了也不怕了

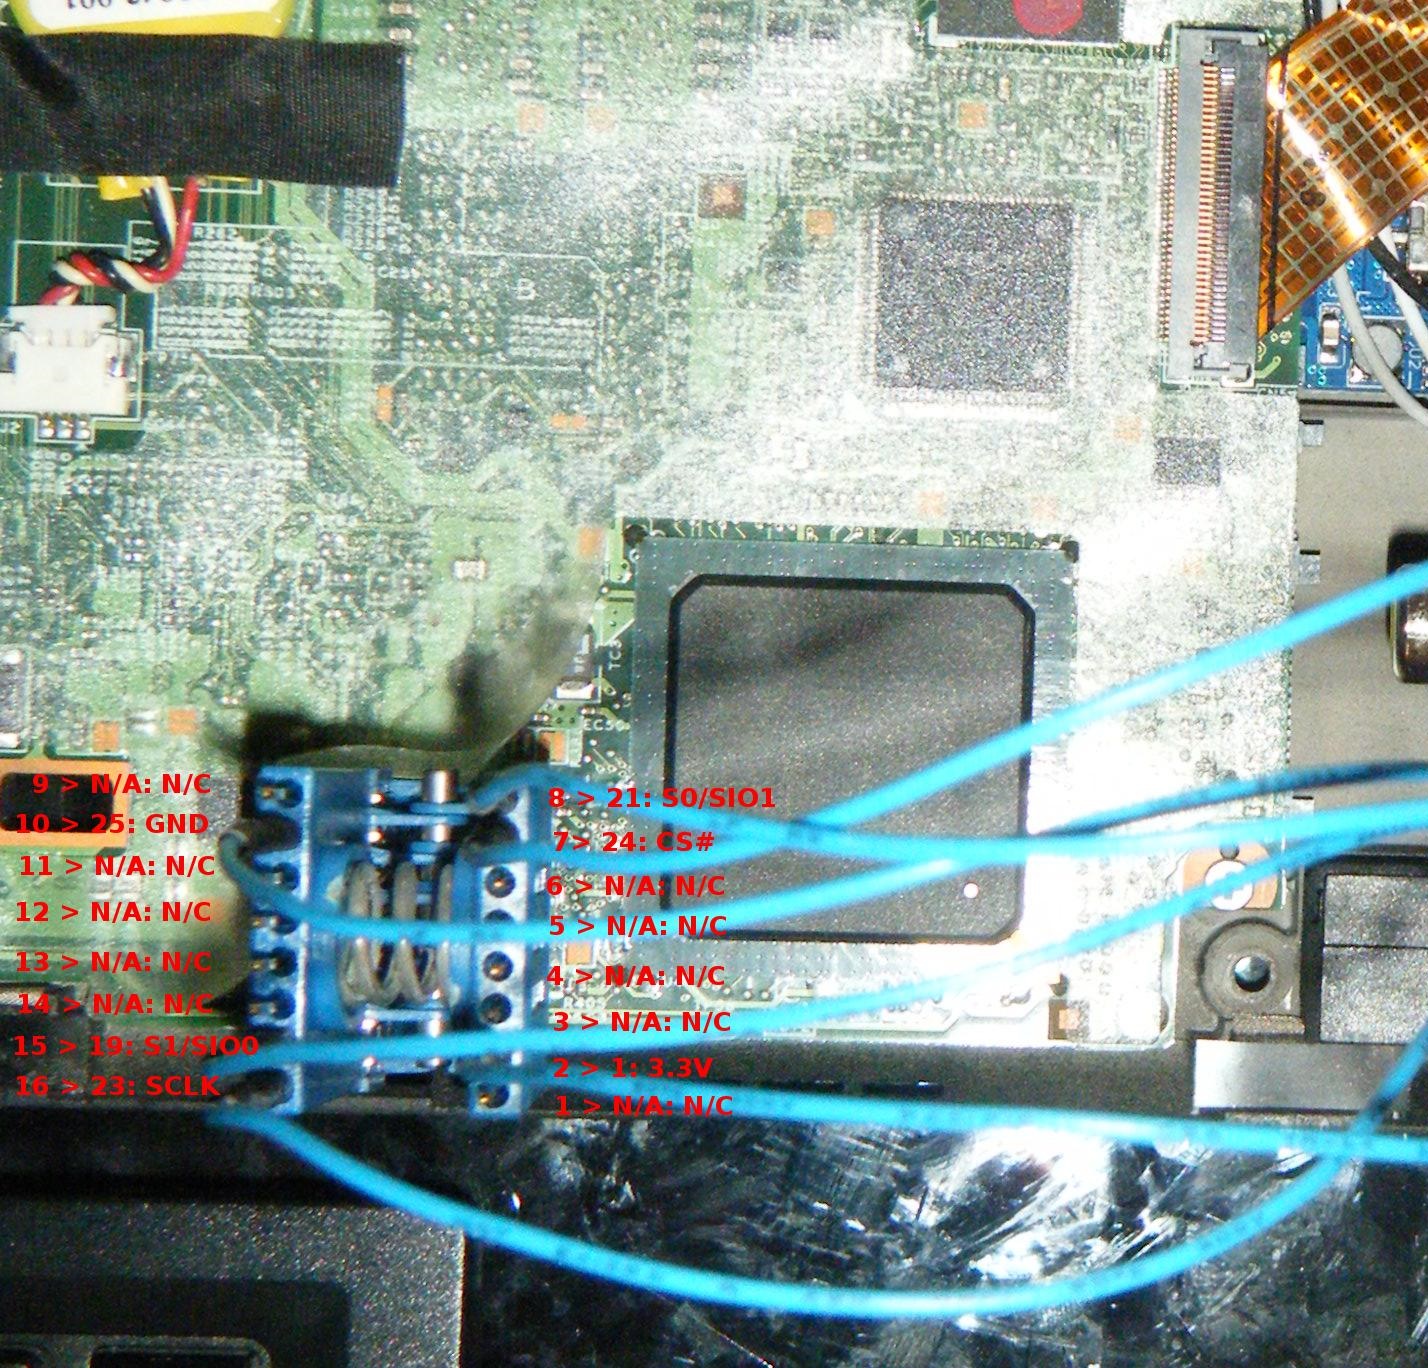
| Pin | SPI Pin Name | Orangepi Pin |
|---|---|---|
| 1 | not used | not used |
| 2 | 3.3V | 1 |
| 3 | not used | not used |
| 4 | not used | not used |
| 5 | not used | not used |
| 6 | not used | not used |
| 7 | CS# | 24 |
| 8 | S0/SIO1 | 21 |
| 9 | not used | not used |
| 10 | GND | 25 |
| 11 | not used | not used |
| 12 | not used | not used |
| 13 | not used | not used |
| 14 | not used | not used |
| 15 | S1/SIO0 | 19 |
| 16 | SCLK | 23 |